
Of my personal Top Ten best photos, this one still gets the most views by far.
Showing posts with label HDR. Show all posts
Showing posts with label HDR. Show all posts
Monday, June 4, 2012

Saturday, March 24, 2012
G1X: HDR

Photomatix “Grunge”
The picture above is all too often the image in mind when High Dynamic Range (HDR) photography is being discussed. This image is not from the G1X. This image was post-processed in Photomatix using three RAW shots from the G1X. The Photomatix setting was “Grunge”. I don’t like it but it does get your attention! I set up this scene to show variations on HDR images made with the G1X. The scene has shadows with detail as well as a bright sky. In my experience, HDR is often necessary for such wide range of contrast. In fact, when the camera histogram indicates a “good” exposure without clipping, HDR is not necessary or effective. The in-camera HDR (using “Standard” setting) from the G1X is below.

G1X in-camera HDR “Standard”
Now it is obvious why the G1X “HDR” is sometimes criticized for being too tame – G1X HDR do not look like over-the-top “HDR” images. However, on comparison to the normal G1X in-camera JPEG below, one can tell that the G1X HDR images do indeed open up the shadows while not blowing out the highlights in the process. The normal JPEG has slight clipping in the shadows and much clipping in the highlights.

G1X in-camera default JPEG
Not “Grunge” but still not a good HDR for this scene is the “Painterly” setting in Photomatix shown below. The bright areas between tree and sky is called the “halo effect”.

Photomatix “Painterly”
Just to show that all the Photomatix canned settings are not bad, the image below was made with “Smooth Sky”. Of course, the canned defaults really serve as starting points and can be adjusted in many ways.

Photomatix “Smooth Sky”
In comparison to the in-camera HDR from the G1X, the Photomatix “Smooth Sky” needs a bit more contrast and saturation in my view. This adjustment can be done in the Photomatix settings or by using Photoshop post-processing after Photomatix. However, my favorite “HDR” for this scene is the “Compressor” rendition from Photomatix, below.

Photomatix “Compressor”
In fact, more often than not, I prefer the “Compressor” rendition with a little customization in the settings to fit the scene. I’ve probably gone through my over-the-top HDR days (well, almost) and Compressor suits me just fine (except that my all time favorite is not realistic at all).
Note that all shots above were made with the G1X mounted on a tripod and set for the defaults. I made no effort to select focus, compensate exposure or tweak the in-camera settings. With tweaks, surely every image could have been improved. Likewise, I used Photomatix default settings and profiles and these could (should!) have been adjusted.
There are so many, many variations on HDR that it is almost not fair to even begin the comparisons. Here’s another set of G12 variations; I assume that the G1X variations are similar to the G12 but will have to check them out.
I occasionally use HDR but usually process three shots in Photomatix and, almost always, select the Compressor rendition. The G1X in-camera HDR seems to do a reasonable job of capturing shadow and highlight details but the G1X shot-to-shot time interval does require a tripod. I know myself well enough to know that even if I made a G1X in-camera HDR I could not resist auto-bracketing three shots in RAW and seeing how the Photomatix variation turned out.
Sunday, December 4, 2011
PAW 48

When I undertook the picture a week challenge, my intention was to avoid “manipulated” pictures such as “Photoshopped” and especially
“HDR” post processed images. In the course of doing this for nearly a year, I’m reminded that I do like HDR post processing for certain situations and images. On the other hand, my HDR preferences are now tending towards less dramatic contrast and saturation.
This particular picture was taken on an overcast day with the handheld Canon 7D (although set for high speed) using Av mode and auto bracketing at +/- 2 stops. Processing was done first in ACR and then Photomatix using the “Adjust” method. After processing three images in Photomatix, the final version was slightly tweaked in Photoshop.
Sunday, October 23, 2011
PAW 42

It’s that time of year when I begin my annual search for hay bales to photograph. This one, not too far from my house, was taken in mid-morning with my Canon 7D. This is another HDR composited image and made from five shots: -2, –1, 0, +1, +2 EV exposures. Looking at the above HDR image as I write, it appears to show some haloing; however, the full screen version and the print version do not show this effect.
HDR processing was done in Photomatix from .tif files processed from RAW in ACR. Although I often use the “compressor” mode in Photomatix, this one was processed with “details enhancer”. The tonemapped version was then opened in Photoshop for final processing.
Sunday, September 4, 2011
PAW 35

With Tropical Storm Lee raining down on us for a few days and thankful that I’ve been without resulting photojournalism opportunities, I arranged (that is, walked into the dining room) a High Dynamic Range (HDR) scene. Even with the overcast sky, outside was much, much brighter than inside. Checking a few exposures, it seemed that there was about a six stop difference without the overhead light.
With the G12, I took eight shots, one stop apart at ISO 80 and f5.6. I then turned on the overhead light to illuminate the flowers and got one more shot. The eight bracketed shots were combined in Photomatix to get the 32 bit HDR image and then Tonemapped to a 16 bit TIF. The lighted flowers were added as a 50% opacity layer in Photoshop and everything masked off except the flowers. More Photoshopping and then cropped to this oblong aspect ratio to eliminate some background clutter.
This is one of the better HDR images that I’ve made in a while so I’m pleased to call it PAW 35.
Sunday, June 26, 2011
PAW 25

This week, I just couldn’t resist a little trickery, or more appropriately a little Photoshopery – but actually done with HDR and Photomatix tone mapping followed by tweaking in Photoshop. I’d been wondering about making an HDR image when using slow shutter speeds to get a blurred falling water effect. This one was made with seven shots. Of the seven shots used to make this HDR image, the shortest exposure – 1/40 second – was needed to get the sky correctly exposed; however, the water fall was not blurred. The longest exposure – 1 second – definitely blurred the waterfall and burned in the shadows as well. I suppose it is a little “over the top” as most HDR shots tend to be but still sort of interesting.
Wednesday, May 4, 2011
Gordon’s Top Ten

I have a gallery at SmugMug in which I maintain my ten best photographs. I’ve not changed those top ten very often. When I check the statistics developed by SmugMug, this picture, “Plantation Bedroom”, invariably gets the most views. This is an HDR picture developed blending (as I recall) seven shots at varying exposures. I like it a lot.
Saturday, March 5, 2011
PAW 9

This week’s PAW is an HDR image processed in Photomatix and further tweaked, then cropped in Photoshop. It probably doesn’t look “HDR” – at least, I hope not. The G12 was used in manual mode to get exposures at f4, ISO 400 and bracketed shutter speeds of 1.6, 6 and 0.4 seconds. Manual mode was necessary because of the 1 second shutter speed limit in Av mode for G series cameras. The scene is from the country store at Rural Life Museum that was shown in the previous post.
Wednesday, March 2, 2011
G12: SCN Variations

Sunday I roamed the Rural Life Museum looking for PAW candidates and also to give the G12 SCN modes another try. The above picture is a scene from the old country store, shot in Av mode at 1 second exposure, f3.5, ISO 80, tripod mounted of course. This is the in-camera JPEG. I suppose this is a “normal” image.

Above is the in-camera “HDR” version of the “normal” scene. This particular variation is the “sepia” HDR. The exposure was determined automatically as 1/20 second (must be the first shot of the series), f3.5 and ISO 1600. A nice variation to my eye.

The above variation is the “B/W” HDR.

Next, getting out of HDR mode and into “Nostalgic” mode, the above shot was automatically exposed at 1/10 second, f3.5, ISO 800. Within Nostalgic mode, the amount was set at maximum; that is, 5 bars of the available 5.

Again in Nostalgic mode, the above variation is with the amount set to 2 bars of the 5 available. I like this one best.
Thursday, December 30, 2010
G12: HDR Mode
.
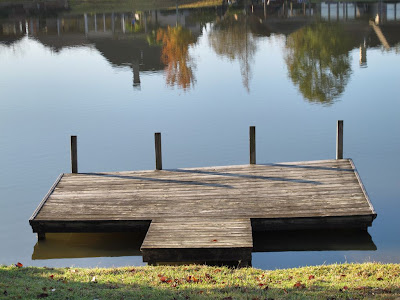
From time to time, I like to tinker with High Dynamic Range (HDR) photos. In the past, HDR, for me, has meant taking at least three photos at varying exposures and combining those images in software such as Photomatix. The combination is then further edited in either Photomatix and/or Photoshop. The G12 has a built-in HDR mode; that is, HDR is included as one of the Scene (SCN) modes. I'd previously tried G12 HDR and didn't care too much for it but decided to give it another try.
G12 HDR is somewhat tersely described on page 71 of the G12 manual. Basically, you select HDR from one of the SCN options, choose a “Color Effect”, secure the G12 on a tripod and fire away. That's right, you do not select ISO, aperture or shutter speed. The G12 takes three shots and combines them. The three component shots are not saved; only the combination is saved.
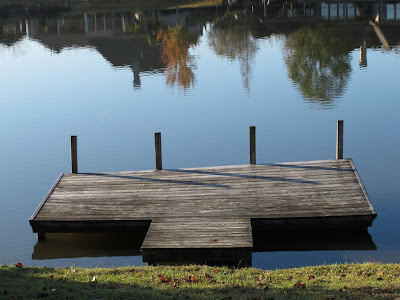
For the above shot, I choose to turn the HDR color effect off because my goal was a more or less normal photo with, hopefully, improved dynamic range. Immediately after getting the HDR shot, I used bracketing to get three more normal shots in RAW+JPEG mode. The “correctly exposed” JPEG is shown below.
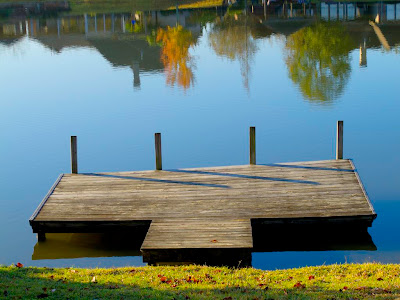
Next, I used Photomatix to generate a 32 bit HDR file and used the Photomatix Tone Compressor to make the “HDR” image below.
Finally, using the more drastic Tone Mapping produced the “HDR” image below (although not a particularly wild variation).
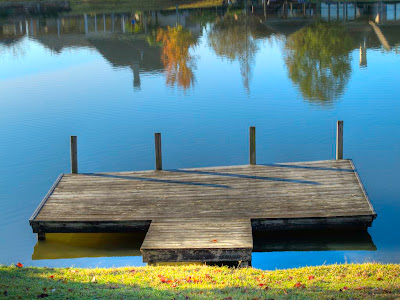
None of the above are particularly "right" or "wrong" -- it's all a matter of taste and being able to use technology to consistently achieve your goal. I haven't quite achieved consistency but have learned that I usually prefer the more modest "Compressor" results of HDR.
All HDR photos are not created equal and some are not even very good. Whereas my early interest in HDR tended to generate unrealistic images, my current approach is to produce more natural images with extended range. Not to say that I will never use the G12 HDR mode but my preference is still to do HDR using the more difficult, but more flexible, process.
.

From time to time, I like to tinker with High Dynamic Range (HDR) photos. In the past, HDR, for me, has meant taking at least three photos at varying exposures and combining those images in software such as Photomatix. The combination is then further edited in either Photomatix and/or Photoshop. The G12 has a built-in HDR mode; that is, HDR is included as one of the Scene (SCN) modes. I'd previously tried G12 HDR and didn't care too much for it but decided to give it another try.
G12 HDR is somewhat tersely described on page 71 of the G12 manual. Basically, you select HDR from one of the SCN options, choose a “Color Effect”, secure the G12 on a tripod and fire away. That's right, you do not select ISO, aperture or shutter speed. The G12 takes three shots and combines them. The three component shots are not saved; only the combination is saved.
For the above shot, I choose to turn the HDR color effect off because my goal was a more or less normal photo with, hopefully, improved dynamic range. Immediately after getting the HDR shot, I used bracketing to get three more normal shots in RAW+JPEG mode. The “correctly exposed” JPEG is shown below.

Next, I used Photomatix to generate a 32 bit HDR file and used the Photomatix Tone Compressor to make the “HDR” image below.

Finally, using the more drastic Tone Mapping produced the “HDR” image below (although not a particularly wild variation).

None of the above are particularly "right" or "wrong" -- it's all a matter of taste and being able to use technology to consistently achieve your goal. I haven't quite achieved consistency but have learned that I usually prefer the more modest "Compressor" results of HDR.
All HDR photos are not created equal and some are not even very good. Whereas my early interest in HDR tended to generate unrealistic images, my current approach is to produce more natural images with extended range. Not to say that I will never use the G12 HDR mode but my preference is still to do HDR using the more difficult, but more flexible, process.
.
Saturday, November 6, 2010
G12: Back to the Lake
.
With the Lensmate adapters, a polarizing filter and a graduated neutral density filter, I returned to the ski lake scene to make comparative pictures. The G12 was mounted on a tripod and set for ISO 80, Av mode, f4 and the widest angle (28mme) focal length. The actual exposure varied with the filters. I tried to work quickly but still took several minutes.
The photo below is the base case without any filters. Shutter speed was 1/125 second. Notice the nice reflection in the lake; however some of the dark areas lack detail.

The photo below was made by adding the graduated neutral density filter. Notice that some of the reflection has disappeared. I think that the lighting changed slightly but I didn't notice it at the time. Shutter speed was 1/160 second.
.jpg)
The next picture is with the polarizing filter. The effect of polarization can be seen in the LCD display screen. I rotated the filter to darken the sky and bring out the clouds. Exposure was 1/40 second. Nice, but notice that the reflection is significantly reduced.
.jpg)
Finally, without using filters, I made nine images for constructing an HDR picture. I set auto exposure bracketing at -2, 0, +2 to get three shots; then changed to -1 exposure compensation and repeated; then changed to +1 exposure compensation and repeated. This procedure gives exposures at -3, -2, -1, 0, +1, +2, +3 and two duplicates. I used the seven shots to make an HDR 32 bit image using Photomatix and, with a bit of trial and error, selected the tone mapped version called "Compressor". A little more post processing in Photoshop produced the version below.

For the HDR image, I did pump up the color saturation a bit but was attempting to tone down the sky and bring out the shadows without creating the overdone appearance that gives HDR a bad name.
The HDR part of the project was a last minute decision (I was in a hurry to set up for Halloween) and I completely forgot about using the G12 "HDR" function so that comparison will have to wait a while.
.
With the Lensmate adapters, a polarizing filter and a graduated neutral density filter, I returned to the ski lake scene to make comparative pictures. The G12 was mounted on a tripod and set for ISO 80, Av mode, f4 and the widest angle (28mme) focal length. The actual exposure varied with the filters. I tried to work quickly but still took several minutes.
The photo below is the base case without any filters. Shutter speed was 1/125 second. Notice the nice reflection in the lake; however some of the dark areas lack detail.

The photo below was made by adding the graduated neutral density filter. Notice that some of the reflection has disappeared. I think that the lighting changed slightly but I didn't notice it at the time. Shutter speed was 1/160 second.
.jpg)
The next picture is with the polarizing filter. The effect of polarization can be seen in the LCD display screen. I rotated the filter to darken the sky and bring out the clouds. Exposure was 1/40 second. Nice, but notice that the reflection is significantly reduced.
.jpg)
Finally, without using filters, I made nine images for constructing an HDR picture. I set auto exposure bracketing at -2, 0, +2 to get three shots; then changed to -1 exposure compensation and repeated; then changed to +1 exposure compensation and repeated. This procedure gives exposures at -3, -2, -1, 0, +1, +2, +3 and two duplicates. I used the seven shots to make an HDR 32 bit image using Photomatix and, with a bit of trial and error, selected the tone mapped version called "Compressor". A little more post processing in Photoshop produced the version below.

For the HDR image, I did pump up the color saturation a bit but was attempting to tone down the sky and bring out the shadows without creating the overdone appearance that gives HDR a bad name.
The HDR part of the project was a last minute decision (I was in a hurry to set up for Halloween) and I completely forgot about using the G12 "HDR" function so that comparison will have to wait a while.
.
Sunday, August 1, 2010
Variations
.
In the previous post, I noted upgrading to Photoshop CS5 and have been tinkering with some of the new tools. Not even counting the 7D picture styles, the near infinite number of variations in post processing are reason enough to have the final result "pre-visualized" (as Ansel Adams supposedly said) before pushing the shutter button and certainly before beginning to post process. I'm not so good at following this advice. Here are a few variations on an image.


In the previous post, I noted upgrading to Photoshop CS5 and have been tinkering with some of the new tools. Not even counting the 7D picture styles, the near infinite number of variations in post processing are reason enough to have the final result "pre-visualized" (as Ansel Adams supposedly said) before pushing the shutter button and certainly before beginning to post process. I'm not so good at following this advice. Here are a few variations on an image.

When I saw the scene above, I immediately thought about making a High Dynamic Range (HDR) image. I set my 7D to ISO 400, Av mode, f8 and high speed bracketing with +/- 3 stops exposure. Above is the in-camera JPEG ("Faithful" picture style), the first of those exposures, taken at 1/250 second. If I'd taken only one shot and used the in-camera JPEG, this would have been the result.

Using Adobe Camera Raw to convert the RAW file and Photoshop to post process to my taste (of that day and time), I came up with the picture above. It's OK but not what I hoped to get.

This one (above) was made from those 3 bracketed shots using CS5's new HDR processing. I was not too pleased with it (lots to learn) but thought "What about a B/W version?". A more more steps and clicks yielded the variation below.

A bit overdone, I'd say, but sort of interesting. Next, I tried the Photomatix HDR software on the same files. In Photomatix, I usually prefer the "Compressor" variations, one of which is below.

Sometimes I prefer the "Enhanced" variation from Photomatix and usually generate both variations while I'm at it. This one (below) didn't work out (default settings).

Finally, I thought about making a B/W using only the first RAW file so I started all over again and came up with the variation below. This is the only variation that I printed.

What does all this mean? For starters, I still have difficulty in selecting scenes suitable for HDR images. I also prefer converting from RAW to get the "best" image. Fortunately, digital post processing allows me to change my mind (OK, several times!).
.
Monday, January 4, 2010
Top 3
.
The votes are in (courtesy of SmugMug statistics -- not visible publicly) and the most popular of my Top Ten is "Plantation Bedroom". In this case, most popular is awarded based on my eyeball judgement of the number of views with emphasis on views of large image sizes and the amount of bandwidth used in viewing. Plantation Bedroom is the winner by nearly a 3:1 margin. It was one of my early attempts at HDR and is derived from 7 images (sometimes I say 9 -- I've forgotten but it was more than 5) from the 20D.

Second place goes to "'Round the Campfire" which still makes me smile every time I see it. Another 20D shot, this one was carefully planned but still required a bit of cloning and layering multiple shots. I've even made a Blurb book of my Swiss Army Knives.
The votes are in (courtesy of SmugMug statistics -- not visible publicly) and the most popular of my Top Ten is "Plantation Bedroom". In this case, most popular is awarded based on my eyeball judgement of the number of views with emphasis on views of large image sizes and the amount of bandwidth used in viewing. Plantation Bedroom is the winner by nearly a 3:1 margin. It was one of my early attempts at HDR and is derived from 7 images (sometimes I say 9 -- I've forgotten but it was more than 5) from the 20D.
Second place goes to "'Round the Campfire" which still makes me smile every time I see it. Another 20D shot, this one was carefully planned but still required a bit of cloning and layering multiple shots. I've even made a Blurb book of my Swiss Army Knives.
... and in third place we have the aptly entitled "Bike on Beach". This one was made with medium format twin lens reflex (TLR) film camera.


The other 7 pictures received nearly equal attention. At this time, I'm not replacing any of them but I am tempted to do so.
.
Friday, November 7, 2008
High Dynamic Pumpkin
.
.jpg)
As an 12x18 inch on canvas, I like it a lot. A screen sized version is in my G9 gallery on SmugMug.
Why Av mode? A neat trick is to use Av mode and also set auto exposure bracketing. This produces three shots. Next, dial in some negative exposure compensation and fire again to get three more shots. Finally, dial in some positive exposure compensation and get three more shots. Depending on the settings for exposure bracketing and exposure compensation, some of the shots may be at the same exposure but you’ll only touch the camera twice during the process.
.jpg)
I like High Dynamic Range (HDR) photography although I must admit that my results are still unpredictable. A new book, “Complete Guide to High Dynamic Range Digital Photography” by Ferrell McCollough, is helping me to become more consistent in my HDR processing.
This HDR image was made using four shots from my Canon G9. The G9 was in Av mode, ISO 400, manual focus. ISO 400 helped to avoid some very long exposures and also to dodge the Av “bug” that limits shutter speeds to 1 second. The four shots were combined in Photomatix and also tone mapped in Photomatix before final touchups, including noise reduction with Noiseware, in Photoshop CS4.
This HDR image was made using four shots from my Canon G9. The G9 was in Av mode, ISO 400, manual focus. ISO 400 helped to avoid some very long exposures and also to dodge the Av “bug” that limits shutter speeds to 1 second. The four shots were combined in Photomatix and also tone mapped in Photomatix before final touchups, including noise reduction with Noiseware, in Photoshop CS4.
As an 12x18 inch on canvas, I like it a lot. A screen sized version is in my G9 gallery on SmugMug.
Why Av mode? A neat trick is to use Av mode and also set auto exposure bracketing. This produces three shots. Next, dial in some negative exposure compensation and fire again to get three more shots. Finally, dial in some positive exposure compensation and get three more shots. Depending on the settings for exposure bracketing and exposure compensation, some of the shots may be at the same exposure but you’ll only touch the camera twice during the process.
.
Tuesday, April 15, 2008
Still More Variations on Bright Sky Processing
.
In what could easily become a never-ending presentation on variations in post processing, I’ll call it quits after this one. Previously, the scenario was that only one auto-exposure shot was taken of a scene with bright sky but dark foreground. The challenge was to get the best final image from either JPEG or RAW with simple post processing. Next, let’s consider a bit more involved post processing.

Show above are comparisons of the images made with a graduated neutral density filter (Image 4) from the first posting, a Photoshop simulation of a graduated neutral density filter (Image 11) and a Photoshop blend of two “exposures” (Image 12). Images 11 and 12 were made from the same raw file – only one real exposure – but processed twice in Adobe Camera Raw (ACR).
Image 11 was made from a raw file processed first with -1/2 stop of “exposure” (for the best sky) and then again with +1 stop of exposure (for the best tree/ground); this created two image files. In Photoshop CS3, the sky exposure (-1/2) was placed as a layer on top of the ground exposure (+1). The sky layer was then blended into the ground layer by using a graduated layer mask. There are many references and tutorials on this technique. Here are some links:
Sharon Lowe
Digital Camera Magazine
Luminous Landscape
A more involved variation on these ideas is shown on the Luminous Landscape – one of my favorite photo sites. Image 12 above was made with that blending process but simplified by using Fred Miranda’s DRI Pro plugin for Photoshop. First, using ACR, two variations on exposure, + ½ stop and – ½ stop, were made from the same raw file and then saved. These two variations were loaded into DRI Pro.
Of course, you can use two or more real exposures instead of simulating exposure variations in Photoshop. Image 13, below, was made from two real exposures, +1 and -1, using DRI Pro. And then, there’s High Dynamic Range (HDR) …
.jpg)
High Dynamic Range is a computer based method of combining several exposures to increase the tonal range. Some like HDR and some do not; in fact, sometimes I like HDR and sometimes not. HDR images can be a bit over-the-top according to the final processing -- the “tone mapping”. There are a number of HDR software packages available. I usually use Photomatix and/or the HDR features contained in Photoshop CS3. Some of my favorite images are HDR based.
Both Image 14 and 15 above were made from three exposures at -1, 0, +1 using Photomatix. For Image 14, tone mapping was done using the default settings – a somewhat gentle and conservative approach. Image 15 was done using a more aggressive tone mapping approach.
Of the infinite possibilities, I’ve shown 13 variations on the theme of photographing and processing images for scenes having a bright sky but dark foreground. The interesting aspect of all this is that each of these methods has a place and that someone – but not everyone – will prefer one method instead of the others. But then, that’s photography and photographers!
.
In what could easily become a never-ending presentation on variations in post processing, I’ll call it quits after this one. Previously, the scenario was that only one auto-exposure shot was taken of a scene with bright sky but dark foreground. The challenge was to get the best final image from either JPEG or RAW with simple post processing. Next, let’s consider a bit more involved post processing.
Show above are comparisons of the images made with a graduated neutral density filter (Image 4) from the first posting, a Photoshop simulation of a graduated neutral density filter (Image 11) and a Photoshop blend of two “exposures” (Image 12). Images 11 and 12 were made from the same raw file – only one real exposure – but processed twice in Adobe Camera Raw (ACR).
Image 11 was made from a raw file processed first with -1/2 stop of “exposure” (for the best sky) and then again with +1 stop of exposure (for the best tree/ground); this created two image files. In Photoshop CS3, the sky exposure (-1/2) was placed as a layer on top of the ground exposure (+1). The sky layer was then blended into the ground layer by using a graduated layer mask. There are many references and tutorials on this technique. Here are some links:
Sharon Lowe
Digital Camera Magazine
Luminous Landscape
A more involved variation on these ideas is shown on the Luminous Landscape – one of my favorite photo sites. Image 12 above was made with that blending process but simplified by using Fred Miranda’s DRI Pro plugin for Photoshop. First, using ACR, two variations on exposure, + ½ stop and – ½ stop, were made from the same raw file and then saved. These two variations were loaded into DRI Pro.
Of course, you can use two or more real exposures instead of simulating exposure variations in Photoshop. Image 13, below, was made from two real exposures, +1 and -1, using DRI Pro. And then, there’s High Dynamic Range (HDR) …
High Dynamic Range is a computer based method of combining several exposures to increase the tonal range. Some like HDR and some do not; in fact, sometimes I like HDR and sometimes not. HDR images can be a bit over-the-top according to the final processing -- the “tone mapping”. There are a number of HDR software packages available. I usually use Photomatix and/or the HDR features contained in Photoshop CS3. Some of my favorite images are HDR based.
Both Image 14 and 15 above were made from three exposures at -1, 0, +1 using Photomatix. For Image 14, tone mapping was done using the default settings – a somewhat gentle and conservative approach. Image 15 was done using a more aggressive tone mapping approach.
Of the infinite possibilities, I’ve shown 13 variations on the theme of photographing and processing images for scenes having a bright sky but dark foreground. The interesting aspect of all this is that each of these methods has a place and that someone – but not everyone – will prefer one method instead of the others. But then, that’s photography and photographers!
.
Friday, September 21, 2007
The Great Reify and Redact Project: Completed!
Actually, the Great Reify and Redact Project has been finished for a few weeks except for making the announcement. The prints had been made but there was no place to put them because portfolio box was backordered. When the box arrived, I signed the prints and carefully placed them between interleave tissue.
The final print -- but an easy one to select -- is a High Dynamic Range (HDR) print of a bedroom scene in a restored Louisiana plantation home. I've attempted to capture this scene many times but the challenge of getting the proper exposure has been insurmountable until I learned the HDR technique.
With HDR, several different exposures are made for the same scene. In this picture, seven exposures were used. These seven shots were combined with special software and further processed in Photoshop. The resulting image looks a bit strange but I like it very much. Many people believe that this is a photograph of a painting.
Project completed!
The final print -- but an easy one to select -- is a High Dynamic Range (HDR) print of a bedroom scene in a restored Louisiana plantation home. I've attempted to capture this scene many times
 but the challenge of getting the proper exposure has been insurmountable until I learned the HDR technique.
With HDR, several different exposures are made for the same scene. In this picture, seven exposures were used. These seven shots were combined with special software and further processed in Photoshop. The resulting image looks a bit strange but I like it very much. Many people believe that this is a photograph of a painting.
Project completed!
Friday, August 3, 2007
PopPhoto Shootout 2007
OK, so I didn’t win, place or show. I didn’t even make the finals in the 2007 Shootout contest sponsored by Popular Photography and Imaging magazine. But I did finish the assignments and had a good time doing it. More importantly I learned a lot and am a better photographer for having participated.
But I sure wish that even one of my shots would have been published. Hmmm, I have this blog and …
This year was the third year for PopPhoto to sponsor their great shootout. Their procedure for the first two years was to select three finalists, bring those photographers to New York and give them three days of tough photographic assignments. This year, the entire contest was conducted over the Internet.
The first phase was to register and submit four photographs: a landscape, an action photo, a portrait and a product photo. I sorted through some of my favorites and quickly entered all four.
Naturally, I first selected one of my favorites, Wallace, which has already been posted here and will be included in my Reify and Redact project as well. The other selections were


It seemed to me that between two and three thousand photographers registered but some entered only one or two photographs. Some entered more than four. At the end of this first phase of the contest, there were nearly seven hundred fully qualified entrants and I was hanging in there.
Next, the assignments ...
But I sure wish that even one of my shots would have been published. Hmmm, I have this blog and …
This year was the third year for PopPhoto to sponsor their great shootout. Their procedure for the first two years was to select three finalists, bring those photographers to New York and give them three days of tough photographic assignments. This year, the entire contest was conducted over the Internet.
The first phase was to register and submit four photographs: a landscape, an action photo, a portrait and a product photo. I sorted through some of my favorites and quickly entered all four.
Naturally, I first selected one of my favorites, Wallace, which has already been posted here and will be included in my Reify and Redact project as well. The other selections were


It seemed to me that between two and three thousand photographers registered but some entered only one or two photographs. Some entered more than four. At the end of this first phase of the contest, there were nearly seven hundred fully qualified entrants and I was hanging in there.
Next, the assignments ...
Subscribe to:
Posts (Atom)